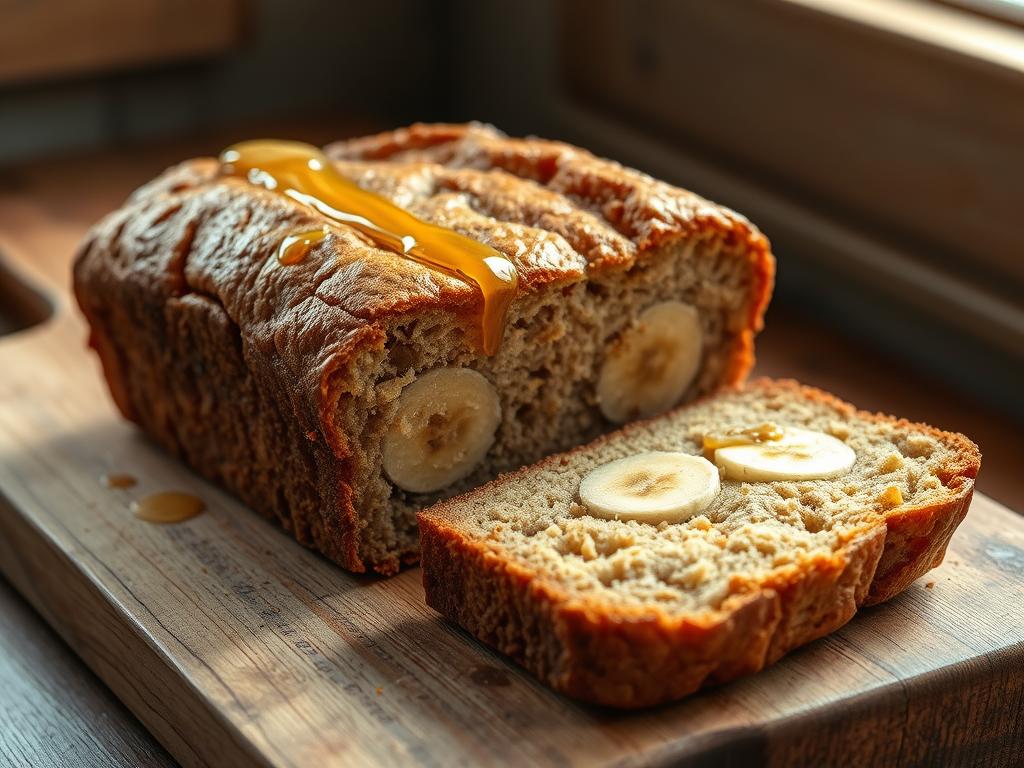
Rustic Sourdough Banana Bread With Honey Crust
This post may contain affiliate links which means I may receive a commission for purchases made through links at no extra cost to you. I only recommend products I truly believe in. Thank you for your support!
Welcome to the ultimate homemade bread adventure! My sourdough baking journey has led me to create a mouthwatering Rustic Sourdough Banana Bread With Honey Crust. It will turn your kitchen into a delightful bakery. This isn’t just another banana bread recipe – it’s a culinary experience.
Imagine a bread so moist and flavorful that it practically melts in your mouth. With just 10 minutes of preparation and a long fermentation process, this recipe brings together traditional baking techniques and innovative flavor combinations. The secret? Perfectly ripe bananas, a touch of honey, and a sourdough starter that adds depth and complexity to every slice.
Whether you’re a seasoned baker or a curious home cook, this Rustic Sourdough Banana Bread With Honey Crust will become your new favorite recipe. Get ready to fill your kitchen with an irresistible aroma and create a bread that’s both nostalgic and exciting!
Understanding Sourdough Banana Bread Basics

Explore the world of artisanal baked goods with a sourdough banana bread recipe. It turns simple ingredients into a special treat. Sourdough baking is more than a method; it’s an art that makes home cooking better.
Benefits of Using Sourdough Starter
A sourdough starter adds amazing benefits to your banana bread. This natural leavening agent offers:
- Improved digestibility of grains
- Enhanced nutritional profile
- Deeper, more complex flavor development
- Natural probiotic properties
Role of Fermentation in Flavor Development
Fermentation is key to creating rich flavors in baked goods. Wild yeasts and bacteria break down carbs. This makes a symphony of flavors that quick breads can’t match.
| Fermentation Stage | Flavor Impact |
|---|---|
| Initial Fermentation | Develops tangy undertones |
| Extended Fermentation | Creates deeper, more nuanced taste |
| Final Proofing | Enhances overall bread complexity |
Why Choose Honey Over Regular Sugar
Honey is more than a sweetener; it’s a flavor booster. Unlike refined sugar, raw honey adds:
- Natural floral notes
- Subtle sweetness
- Additional nutritional benefits
- Rich, golden color
Using sourdough techniques and choosing the right ingredients turns banana bread into a special treat. It pleases both your taste buds and soul.
Essential Ingredients for Perfect Rustic Sourdough Banana Bread With Honey Crust

Making the perfect homemade bread begins with choosing the best ingredients. For our rustic sourdough banana bread, each part is key to rich flavor and great texture.
Let’s explore the main ingredients that make this sourdough baking journey special:
- Ripe Bananas: Find bananas with deep brown spots – they’re full of natural sweetness
- Active Sourdough Starter: The bread’s heart, needing careful prep
- Honey: A natural sweetener that adds depth and makes a stunning crust
- High-quality flours: A mix of all-purpose, bread, and whole wheat flour
In sourdough baking, precision is key. I suggest using a kitchen scale for accurate measurements. Your sourdough starter should be at its best – doubling in size in 4 to 5 hours before baking.
| Ingredient | Quantity | Purpose |
|---|---|---|
| Sourdough Starter | 50 grams | Leavening and flavor development |
| Ripe Bananas | 2-3 medium | Moisture and natural sweetness |
| Honey | 30 grams | Sweetener and crust enhancement |
Pro tip for sourdough baking: Feed your starter 4-12 hours before starting to ensure maximum activity and flavor potential!
Mastering the Mixing Method
Making the perfect banana bread is all about precision and care. The artisanal way turns a simple quick bread into something special. Let’s explore the mixing technique that will take your sourdough banana bread to the next level!
Proper Starter Activation
Getting your sourdough starter ready is key for great flavor and texture. Here’s how to do it:
- Use 20 g of active sourdough starter
- Mix with 80 g of warm water (around 85-90°F)
- Add 80 g of bread flour
- Let it sit for 1 hour
Combining Wet and Dry Ingredients
The magic happens when wet and dry ingredients come together. Make a well in the flour and mix in the wet ingredients gently. Remember, gentle mixing keeps those air bubbles intact!
| Ingredient Category | Quantity | Notes |
|---|---|---|
| Whole Wheat Flour | 150 g | Adds nutty flavor |
| All-Purpose Flour | 155 g | Provides structure |
| Bread Flour | 195 g | Enhances gluten development |
| Fine Sea Salt | 9 g | Balances flavor |
Achieving the Right Consistency
The no-knead method is a game-changer. Instead of kneading, you’ll do 4 stretch and fold sets every 30 minutes. This builds gluten and gives you an amazing texture.
- Mix until ingredients are just combined
- Leave some banana chunks for rustic texture
- Watch for a 50% volume increase during fermentation
- Maintain a 75% hydration level for optimal consistency
Creating the Signature Honey Crust
Making the perfect honey crust is the final touch for your Rustic Sourdough Banana Bread With Honey Crust. This golden-brown crust turns a simple loaf into a special treat.
The key to a delicious honey glazed bread is in the prep and technique. Let’s explore how to make that perfect crust!
- Select high-quality honey for the most vibrant flavor
- Use room temperature ingredients for smooth application
- Brush honey mixture generously before baking
To get the ultimate honey crust, you need a special glaze. It caramelizes beautifully in the oven. Here’s how I do it:
- Melt 1 tablespoon of butter
- Mix with 1 tablespoon of pure honey
- Gently brush the mixture onto the bread’s surface
The magic happens when the honey caramelizes in the hot oven. It creates a shatteringly thin crust. This crust adds incredible depth to your sourdough banana bread. The honey’s natural sugars make the crust golden-brown, crisp, and slightly sweet.
Pro tip: Bake at about 475°F for the perfect honey glaze. The heat turns your bread into a masterpiece. It will impress everyone and make them want your secret recipe!
Baking Techniques for the Perfect Texture
Making the perfect homemade bread is all about precision and care, more so with sourdough. The baking process turns your dough into a golden loaf with a tender crumb.
Temperature Control Tips
Getting the oven temperature right is key for sourdough banana bread. Experts say to preheat to 450°F (230°C) first. This high heat gives a crispy crust and keeps the inside moist and tasty.
- Preheat oven to 450°F (230°C)
- Use an oven thermometer for accuracy
- Place a water pan on the bottom rack to create steam
Timing Your Bake
Timing is everything in sourdough baking. For our rustic banana bread, here are the baking stages to follow:
| Baking Stage | Duration | Temperature |
|---|---|---|
| Initial Covered Baking | 18-20 minutes | 450°F (230°C) |
| Uncovered Baking | 10-15 minutes | Reduced to 375°F (190°C) |
Testing for Doneness
To know when your bread is done, use these methods:
- Internal temperature should reach 200°F (93°C)
- Use a digital thermometer for precise reading
- Tap the bottom of the loaf – it should sound hollow
- Look for a deep golden-brown crust
Pro tip: Rotate your loaf 180 degrees halfway through baking. This ensures even browning and texture.
Storage and Serving Suggestions
After baking your banana bread, it’s key to store it right. This keeps its flavor and texture top-notch. My farmhouse kitchen has some tips to keep your banana bread fresh and tasty!
There are many ways to store your homemade sourdough banana bread. Here are some good methods:
- Room Temperature Storage: Keep the bread in an airtight container for 3-4 days
- Freezer Storage: Slice and freeze for up to 3 months
- Refrigeration: Wrap tightly to prevent moisture loss
Here are some ways to make your banana bread special:
- Toast a thick slice and spread with salted butter
- Create a breakfast treat with cream cheese and honey
- Use as decadent French toast base
| Storage Method | Duration | Best Practices |
|---|---|---|
| Room Temperature | 3-4 days | Use airtight container |
| Freezer | Up to 3 months | Wrap individually before freezing |
Pro tip: Always let your banana bread cool completely before storing. This prevents moisture and keeps it perfect!
Troubleshooting Common Issues
Even experienced bakers face challenges when making homemade bread. Dense textures and undercooked centers can be frustrating. Understanding how ingredients and techniques affect your loaf is key.
Ingredient ratios are crucial in sourdough baking. Too much flour makes the loaf dense, while too little liquid prevents it from rising right. A sluggish starter also leads to flat bread. Make sure your starter is bubbly and well-fed.
Oven temperature and baking techniques matter a lot. If the crust gets too dark, try baking at a lower temperature and cover the loaf with foil. Uneven rising can be fixed by focusing on surface tension during shaping. Aim for a dough that’s risen by two-thirds, not just doubled in size.
See each baking experience as a chance to learn. Sourdough baking takes patience and practice. Keep an eye on your starter’s health, adjust ingredients carefully, and don’t hesitate to try new things. With time, you’ll get better at making delicious homemade bread. 🍞